
Microsoft Power Automate fundamentals training with Dynamics Edge helps you understand how to set trigger on a new SharePoint list item isn’t firing, where many common factors could be at play here that you can learn about.
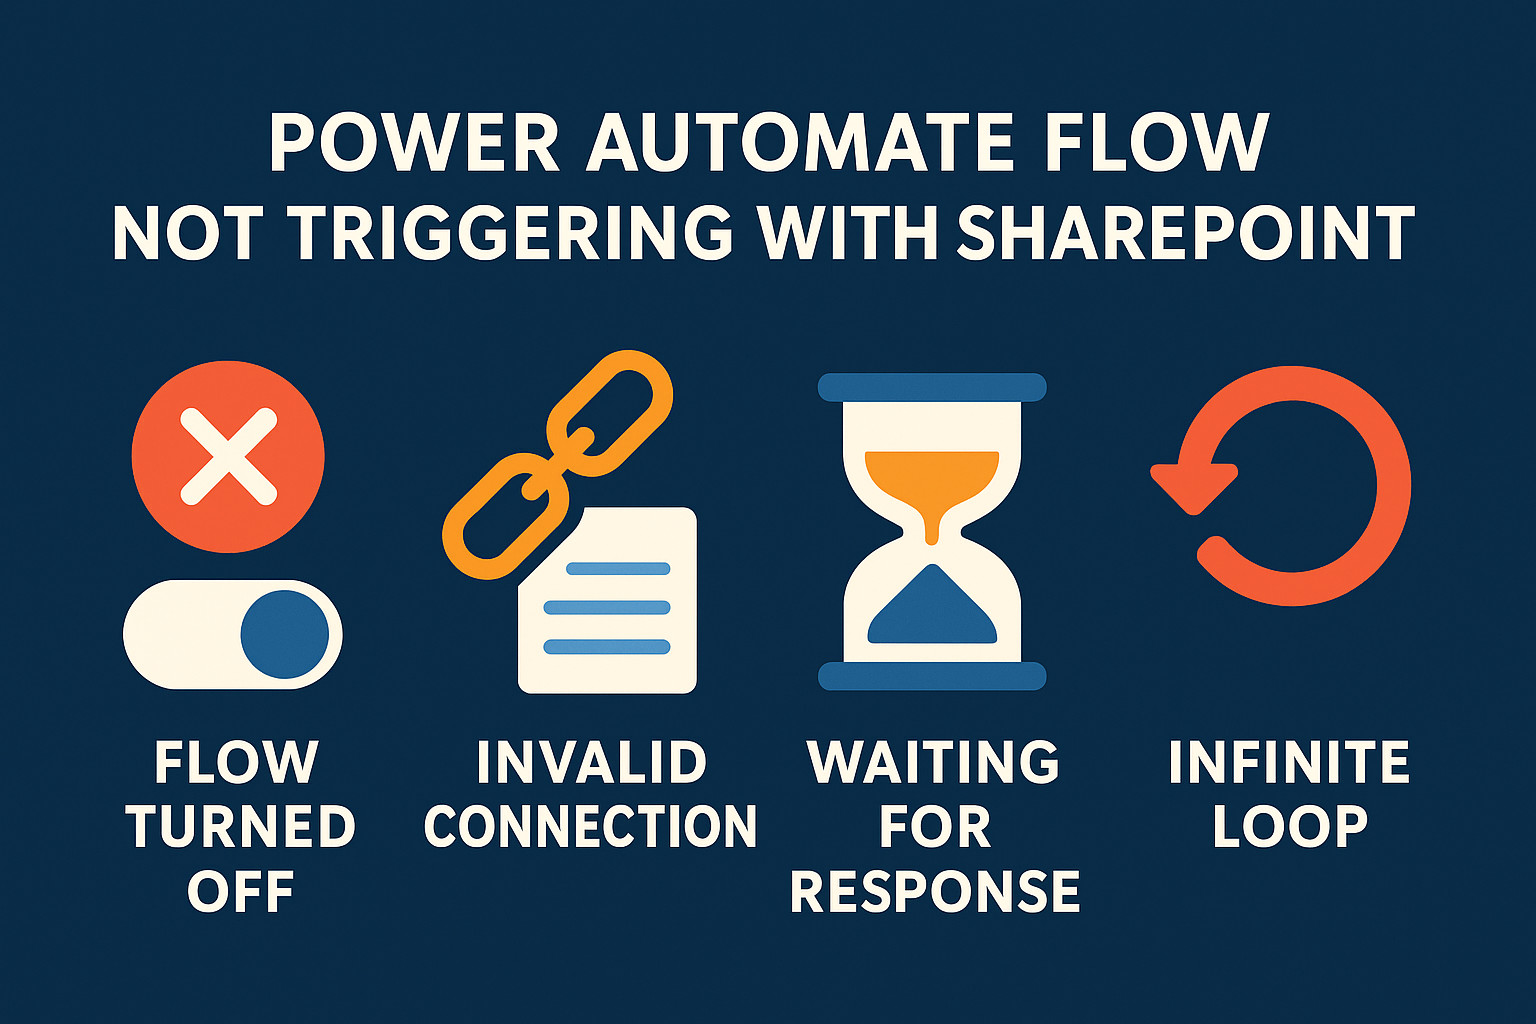
Flow or Environment State: Make sure your flow is turned on and not in an environment “admin mode.” If admin mode is enabled for the environment (such as a sandbox), all background processes including flows are paused, preventing triggers from firing. Likewise, confirm the flow itself is enabled (not turned off) and has no pending save errors.
Trigger Configuration or Conditions: Double-check that the trigger is configured for the correct site/list and that no inadvertent trigger condition is blocking it. If a trigger condition is set and not met, the flow’s run will be skipped (in run history you’d see the trigger check “skipped,” meaning the condition wasn’t satisfied). For example, a condition on the trigger that never evaluates to true will prevent any run from starting.
Connections and Permissions: Verify the SharePoint connection the flow uses is valid and not broken or expired. A broken connection (e.g. if the credentials changed) can prevent the trigger from registering events. Also check if the account running the flow has proper access to the list (though triggers usually use a service connection). Missing permissions or an invalid connection can silently cause triggers to not fire.
Trigger Frequency or Throttling: The SharePoint “When an item is created” trigger is an automatic, webhook-based trigger. It should fire near-instantly, but there are throttle limits. If a huge number of items are added in a short time, some triggers might be delayed or skipped due to platform limits. By default, flows allow multiple concurrent runs (unlimited with concurrency control off), but if Concurrency Control was turned on and set to a low limit (e.g. 1), new triggers will queue until the current run finishes. In fact, with concurrency control on, only a set number of runs can queue (10 + the degree of parallelism); additional trigger events beyond that may be dropped if the queue is full. This means if one run is stuck and concurrency is limited to 1, after 10 waiting items, further SharePoint item creations might not trigger new runs at all. Removing or increasing the concurrency limit (or ensuring runs complete) will resolve this.
Previous Run Hung or Not Completing: Related to the above, check the flow’s Run History for any run that started but never finished (perhaps showing as still “running” or timed out). An incomplete run can hold up subsequent triggers if only one run is allowed at a time. For example, if the flow got stuck waiting for something (like an approval or an HTTP response) and never terminated, a concurrency limit of 1 would cause new item events to queue or skip. In normal operation (concurrency off), this shouldn’t block other runs, but it’s worth ensuring no long-running instance is clogging the pipeline.
If the basic checks (flow on, correct list, permissions) are all good and the flow still doesn’t trigger on new items, try some standard fixes: turn the flow off and back on, remove and re-add the SharePoint trigger (reconfigure it), or even recreate the flow (or a copy) if it might be a glitch. These steps often reset the subscription to the SharePoint list events. Also monitor the flow’s run history while testing a new item – if no run even registers, it points to a trigger registration issue (connection or config); if a run triggers but fails, examine the error details.
Effect of “Response” Actions on Flow Execution
You may have heard of the suggestion to “remove the response action so the flow trigger completes instantaneously.” This implies the flow had a Response-type action in it, which might be impacting its execution. In Power Automate, Response actions are typically used to send an HTTP response back to a caller – for example, in flows that start with an HTTP Request trigger (a webhook) or in flows triggered by PowerApps (to return data to the app).
However, using a Response action in an automated flow (like one triggered by SharePoint) is not typical – and in many cases, it’s not even allowed. In fact, the platform will throw an error if you try to save a flow with a Response action without an appropriate request trigger. For instance, a known save error is: “The workflow with ‘Response’ action type should not have triggers with ‘splitOn’ property defined” – this occurs when a Response action is added to a flow with a manual or non-HTTP trigger. The design is intentional: a Response must only follow a Request trigger (or PowerApps trigger). As one expert explained, “This is by design. Only flows with a request (HTTP) trigger can have a Response step.” If your flow was triggered by “When an item is created” (SharePoint) and contained a Response action, it could cause the flow to be invalid or not trigger at all.
Even if the flow somehow saved, a Response action in an automated trigger scenario could cause runtime issues. The SharePoint-triggered flow isn’t waiting for any external caller, so a Response action serves no real purpose – the flow would attempt to send a reply to nobody. This might result in the flow hanging or not finishing properly. In a scenario where Flow A calls Flow B via HTTP and Flow B sends a Response, Flow A would wait for that response. If Flow A was your SharePoint-triggered flow calling another flow or API and waiting, that could slow down completion. Removing the Response would allow the flow to end the run without waiting, i.e. “complete instantaneously” after its work, which in turn frees the trigger to handle the next item event quickly.
Does removing the Response action help? Yes, if the Response was improperly used, removing it is advisable. It helps with making sure the flow run finishes normally without hanging waiting for a reply. This is especially important if you had enabled sequential processing (1-at-a-time concurrency) – a quick completion means the next item trigger can proceed immediately. In summary, a SharePoint-based flow usually should not include a Response/Reply action at all. If you need to communicate results out, consider other methods (like sending an email or updating a status column) rather than an HTTP response which is meant for direct requester calls.
Using “Respond to a PowerApp or flow” vs. “Response” Actions
It’s important to distinguish between two similarly named actions in Power Automate:
- “Respond to a PowerApp or flow” – This is an action (found under the PowerApps connector) designed to return output data to a PowerApp or to a parent flow. It’s used in scenarios where the flow was triggered by a PowerApp (button click) or invoked as a child flow by another flow. For example, when creating a child flow (a flow called from another flow), you typically use a Manually trigger a flow (Flow button) trigger for the child, and end with Respond to a PowerApp or flow to send results back to the parent. This combination is what “defines it as a child flow” and lets the parent flow get the response. In short, Respond to a PowerApp or flow provides a way for an instant flow to reply with data.
- “Response” – This is a generic HTTP Response action. It is used exclusively in flows that start with “When an HTTP request is received” (the HTTP webhook trigger) or sometimes in custom API scenarios. The Response action allows you to send a status code, headers, and body back to the HTTP caller. It’s typically how you build a flow that acts as an API endpoint. This action should directly correspond to an HTTP Request trigger; using it in other contexts (like a scheduled or automatic trigger) is not supported.
These two actions are not interchangeable. If your flow is triggered by a SharePoint event (or any automated trigger), you cannot use “Respond to PowerApp or flow” to magically respond to another flow or caller – there is no caller waiting in that scenario. Likewise, if your flow is triggered by PowerApps, you should use the dedicated PowerApp response action, not the raw HTTP Response.
What if we used “Response” instead of “Respond to a PowerApp or flow”? – This question likely arises from trying to circumvent some limitation. In practice, swapping them isn’t useful unless you change the trigger type. One blog experiment considered replacing the PowerApp response with a regular HTTP Response, but found that if used in a PowerApps-triggered flow, it had to be marked asynchronous and ended up giving the same result (the PowerApp didn’t get the return value in real-time). This is because Power Automate enforces a 2-minute timeout for inbound requests: if a response isn’t sent in that time, the connection to the caller (PowerApp) is closed. The Respond to PowerApp action by default sends a synchronous response within that limit. Using a raw Response action in a PowerApps flow would either not be allowed or would behave similarly (and you’d lose the simplicity of passing outputs directly to PowerApps).
Bottom line: Use the action that matches your trigger. For flows triggered by Power Apps or by the “Run a child flow” action, include Respond to a PowerApp or flow at the end to return data. For flows triggered by an HTTP request, use the Response action to reply to the caller. For flows triggered by SharePoint (or other automated events), neither of those response actions is normally used – the flow just runs its course. If you need one flow to call another, either use the built-in “Run a child flow” feature (within Solutions) rather than manually posting to an HTTP trigger, or do make sure you handle the HTTP calls properly (and realize that a SharePoint-triggered flow cannot directly be invoked by another flow except via separate mechanisms like HTTP or queue messages). The new child flow capability is safer and does not require dealing with the HTTP POST URL or premium connectors – you just configure the child with manual trigger + respond action and call it via Run a child flow from the parent. This avoids hard-coding URLs and is easier to maintain.
In summary, mixing up these actions can cause issues: a Respond to PowerApp or flow in a non-PowerApps flow will do nothing useful (or could cause the flow to error out), and a Response action in the wrong context will fail validation. Always match the trigger type with the correct response mechanism.
Preventing Infinite Trigger Loops in SharePoint Flows
Another aspect to consider is the infamous infinite trigger loop scenario. This occurs typically with SharePoint when a flow is triggered by item creation or modification and then one of the flow’s actions updates that same item (or another item that triggers the same flow). This can cause the flow to trigger itself repeatedly in a cycle. The Flow Checker will even warn you if it detects this pattern, with a message like: “Actions in this flow may result in an infinite trigger loop. Please make sure you add appropriate conditional checks to prevent this flow from triggering itself.”. In other words, if your flow updates an item, that update could fire the “When an item is modified” trigger again (or if using “created or modified” trigger, it fires on the update as well), causing a loop.
To prevent an infinite loop, you need to add logic to break the cycle. The best practice is usually to add conditions or trigger filters so that the flow ignores the updates that it itself makes. Some approaches include: using a Trigger Condition (for example, ignore the trigger if a certain “Modified By” user is the flow’s account, or if a status field already has a certain value), or adding a check in the flow before performing an update (only update if the value isn’t already what you would set, etc.).
One straightforward method – especially for a beginner – is utilizing the “Terminate” action in combination with a condition at the top of the flow. Using the Terminate action can immediately stop the flow’s execution when a certain criteria is met, preventing further actions (and thus preventing the triggering update). For example, you can add at the start of the flow: If the list item’s field “Status” is already “Approved” (meaning this flow likely set it already), then Terminate the flow (perhaps with a message “Already processed”) so that no update happens on this run. That way, the second run ends and doesn’t loop again. As one guide notes, “Using the ‘Terminate’ action is a highly effective method for preventing infinite trigger loops in Power Automate.” The steps typically would be:
- Identify the loop condition – e.g. a flag on the item that indicates the flow has run before, or check if “Modified By” is the service account.
- Add a Condition at the start of the flow to evaluate this. For instance, if the item’s “Modified By” equals the flow’s user (meaning the item was just updated by the flow itself), that’s the scenario of a self-trigger.
- In the if-true branch, use a Terminate action – configure it to exit the flow, optionally with a status like “Success” or “Cancelled” and perhaps a comment. This halts the flow’s execution before it makes any new changes.
- Else (if the condition is false), continue with the normal flow actions (meaning the change came from a human or an external source, so it’s a legitimate run that should process).
By doing this, the flow will not re-trigger itself endlessly. The Terminate action helps make sure that in the loop scenario, the flow stops immediately on that run and does not, say, update the item again (which would retrigger it again).
Another example: Suppose your flow triggers on “Item modified” and it sets an “Processed” flag to true on the item. The first run sees the flag was false (not processed), so it proceeds and sets it to true. That update in turn triggers the flow again. On the second run, the condition sees “Processed = true” (set by the flow), and thus the flow knows this modification was done by itself, so it Terminate-exits without doing anything. The loop ends there. This technique effectively breaks the cycle after one iteration.
In addition to Terminate, as mentioned, Trigger conditions are an even more efficient way to handle this (they prevent the flow from even starting on undesired triggers). For example, you can put a trigger condition like: @not(equals(triggerOutputs()?[‘body/Editor/Email’], ‘[email protected]’)) which means “only trigger if the last modifier’s email is not the flow’s service account”. That way, any update done by that account (presumably the flow) will not start a new run. This is a clean solution because it saves runs (the flow won’t even run and then terminate; it just won’t run at all for those cases). The downside is complexity in setting it up, but it’s very effective.
In summary, to prevent infinite loops, add a check to detect self-triggering updates and stop the flow. Using a Terminate action in combination with a condition is a beginner-friendly approach to halt the flow when a loop condition is detected. This makes sure your flow doesn’t consume all your run quotas or spam itself endlessly.
Workarounds for Disabling Specific Actions in a Flow
Sometimes during testing or debugging, you might want to disable a particular action or step in a flow temporarily (as you might in other software by commenting out a line). Power Automate, however, does not have a simple “disable action” toggle in the classic designer – there’s no checkbox to skip an action without deleting it. This can be frustrating, but there are workarounds to effectively achieve the same result:
- Use a Static Result (Preview feature): In the newer flow designer (or for actions that support it), you can enable Static Result on an action to simulate that action’s execution. This is done via the action’s Testing pane – toggling Enable Static Result will cause the action to not actually run, and instead return a preset result as if it succeeded. Essentially, the action is “short-circuited” – when the flow runs, it treats that action as succeeded instantly with whatever static output you define, without executing the real call. This is great for, say, skipping a “Send email” step: you enable static result, maybe define a dummy success output, and the flow will bypass sending an email but continue as though it did. (In the new designer interface, once enabled this option is labeled “Disable Static Result” to turn it back off.) Note: static results might only be available for certain actions/connectors and while in test mode, but Microsoft is making it a general testing feature (it essentially disables the action’s effect).
Enabling “Static Result” on an action in the Testing tab to effectively disable its real execution.
- Wrap the Action in a Condition that Never Runs: A simple trick is to put the action (or group of actions) inside a condition branch that is designed never to execute. For example, add a Condition at that point in the flow: If 2 is equal to 1, put your target action in the “Yes” branch. Since 2 will never equal 1, the “Yes” branch (or whichever branch contains the action) will always be skipped. This effectively disables the action from running. The flow will always go down the “No” path (which can be left empty or contain a placeholder), and your email, update, or whatever action in the other branch won’t fire. Later, you can easily remove the condition or move the action back out to re-enable it. The downside is it adds a little clutter, especially if disabling multiple steps (you might need multiple conditions or a complex one).
- “Run After” Skip Technique: A more advanced method is to use Configure Run After settings. You can intentionally precede the target action with a dummy action that you force to skip, and then set your real action to run only after a skipped predecessor. For instance, insert a dummy action (like a Compose) before the action you want to disable, and configure that dummy action with static result or condition so that it skips. Then on your real action, use the … menu -> Configure run after, and set it to run after the dummy action is skipped. This way, when the dummy is skipped, the real action also will be skipped (because its run-after condition isn’t met – or you can invert logic accordingly). This approach can disable a single action or even a scope of actions if you put them inside a Scope and control the run-after on the scope.
- Temporary Removal or Isolation: If the above feel too fancy, the brute-force method is to simply remove the action (and perhaps paste it elsewhere for safekeeping). You can copy an action (Ctrl+C) and paste it into a separate blank flow as a backup, then delete it from the main flow. Later, you can copy it back. This isn’t elegant but it’s sometimes easier than accidentally emailing 100 people during tests. Alternatively, you can cloning the flow and remove certain parts in the clone for testing, keeping the original intact.
Each of these workarounds has its use cases. For a quick one-off test, the condition hack (2=1) is very straightforward. If the action supports it, the Static Result feature is very handy and is essentially the official way to disable an action’s effect while testing. The run-after skip method is useful if you want to disable a block of actions without restructuring the logic too much (using a Scope container).
Remember to re-enable or remove these test constructs once you’re done debugging. It’s easy to forget a hard-coded false condition and later wonder why a section of the flow never runs! Since Power Automate doesn’t (as of now) have a one-click “disable” toggle on steps, these techniques help you control the flow’s behavior during development and troubleshooting.
Have a Question ?
Fill out this short form, one of our Experts will contact you soon.
Talk to an Expert Today
Call Now